
Click here to go back to the FrontPage version.
Defining a Dreamweaver Site has many advantages. The most important advantage has to do with organization and structure. When a Dreamweaver Site is created, a structure is established that helps prevent organizational errors that could lead to broken links and lost images. When you create a Dreamweaver Site, you can also use the Site Files View by clicking on Window => Site Files in the Menu Bar. If you've defined a Dreamweaver Site, you will see a window similar to the one below.
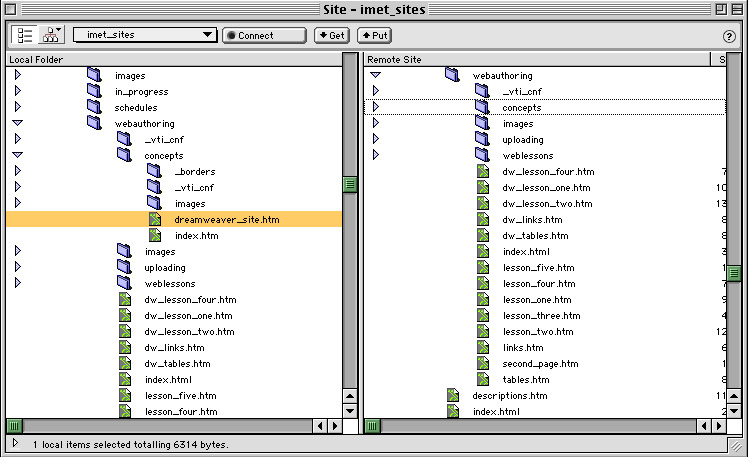
This view proves to be very handy when switching back and forth between web pages within a Dreamweaver Site. For example, you can see the organization of your hyperlinks and check the structure of your folders with just one click.
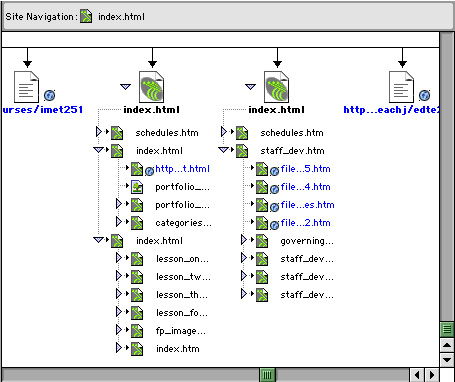
If you define a Dreamweaver Site, you can also view and check your site through a site map as you can see below.
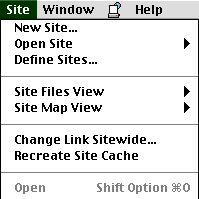
Creating a new site is simple. Open Dreamweaver and go to Site => New Site... on the Menu Bar.
You'll see a dialogue box like the one below.
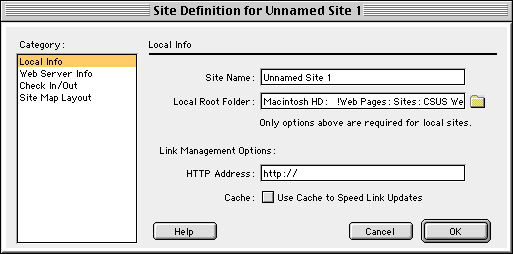
You'll need to establish the name of your Dreamweaver Site - give it a name that makes sense - and then click on the folder icon that will allow you to navigage to what will be the root level of your site. In the example below, you can see that I've navigated to a web folder called "imet_sites". This is the root level for all my iMET websites. Everything within this Dreamweaver Site is related.
![]()
Below is an image of my hard drive as I navigate to the folder I want to establish as my Dreamweaver Site root.
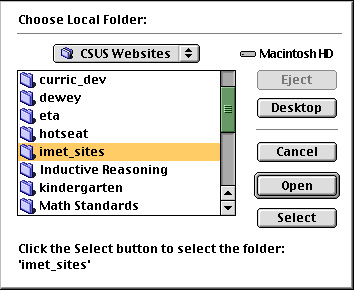
In the example above, notice that I've specified the location of the Dreamweaver
Site by indicating that I want the root to be nested within CSUS Websites.
The name of the Site is "imet_sites". Everything in that folder
is uploaded to the root level on the iMET server. Press ![]() and
you're done.
and
you're done.
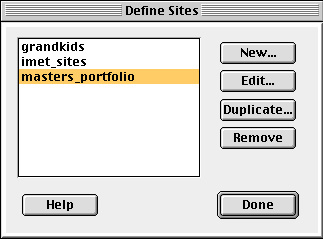
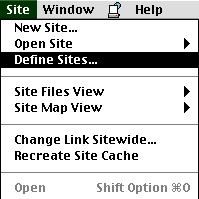
Once you've defined a site, you can always edit it or even remove it. Just go to Site => Define Sites ... and the window below will open. Choose the options you need and follow the directions.
Once created, the procedure for saving and closing a Dreamweaver Site is similar to that of saving and closing most applications. Just use Command + S to save the page you're working on. Go to File => Close or File => Quit. You can reopen the site by launching Dreamweaver. The last Dreamweaver Site you have visited will open by default.
Once your Dreamweaver Site is open, adding a new page is simply a matter of going to File => New on the Menu Bar. Remember to give your page a title and save it with a filename that follows the rules for html filenames.
There may be times when you want to delete a Dreamweaver Site yet preserve the folders and pages. You probably are wondering why you would want to carry out such an extreme procedure. As you produce many Sites, you may find that some of the Sites you have created would be better off as child Sites nested within a parent Site. For example, I have one massiveDreamweaver Site called "imet_sites" which contains many webs that can share images and themes. It is also easy to navigate. At the top of this page you can see an image that shows the complexity of this Site.
You can see that "imet_sites" is the parent Site, but all the dependent sites are available to me when I'm working on iMET webs. Most importantly, I can link to any file or image within "imet_sites" without fear that my links will not be there when users view the product in their browsers. I've mirrored this web on the iMET server so that all relative links are recognized.
But, some of these web folders were created as webs outside the "imet_sites" Site. The "portfolios" Site is a good example of this. When I decided that "portfolios" should be part of the "imet_sites" Dreamweaver Site, I found it was best to reclassify it as a folder rather than as a Dreamweaver Site and then I would import it into the "imet_sites" Dreamweaver Site. This meant removing the "portfolios" Site. Note that this procedure won't delete the files from the hard drive.
To remove (this really should be called reclassifying), you simply click on Site => Difine Sites.
You'll see a window similar to the one below where you can choose the Site you want to remove. In this case, I removed the Site named "masters_portfolio". Once removed, the contents are still intact. The folder is simply not classified as a Dreamweaver Site. I can now add it to my "imet_sites" Site.
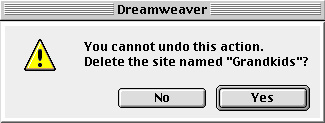
Once the Site is selected, a new window opens giving you a stern warning. Choosing this action reclassifies your web to the simple folder status. None of your work will be lost. You can see that you also have the option to change your mind. I didn't really delete my "Grandkids".
Now that you have seen that you can delete (reclassify) a Dreamweaver Site, you need to know that you can import the folder to a parent Dreamweaver Site such as I have done. The simplest way to do this is to open your hard drive and drag the folder to the new parent site. When you next open Dreamweaver, you'll see that the folder is now an integral part of your Dreamweaver Site.
If you have defined a Dreamweaver Site, you can easily configure Dreamweaver for FTP. Go to Site => Define Sites on the Menu Bar. Select the Dreamweaver Site you want to upload. Click on Edit. The window below opens.
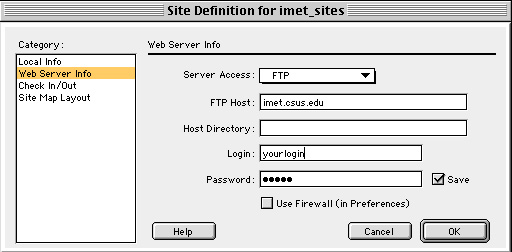
Select "Web Server Info" and fill in the rest as I have shown above using the Host, login names and passwords you would use to FTP to the imet server. Click OK. When you open a site and choose Window => Site Files, your site window will open (see the image at the top of this page) and you can click on "Connect". You'll be taken to your root level on the iMET server. Pretty slick. In Dreamweaver, there's no need for a separate FTP application.
![]()