Building Frames
Probably the easiest way to think
about frames is to imagine frames as pages nested within a page.
The document is named the Frameset (although you can give it any
title you want and save it with anyname.htm) and the parts are
called Frames. An analogy might be useful here. Most of us have
printed documents to special letterhead stationery. A letter of
reference for a student looks nice on school or district letterhead,
for example. In this analogy, the blank paper is the frameset
because it's the main html document. The district logo is one
of the static frames because it doesn't change from page to page.
However, the letter content can be viewed as a dynamic frame because
it will change from page to page. We can also look at the frameset
and frames as we do an empty stage. The empty stage is the frameset,
but the curtains frame it up (static frame). Each scene is also
a dynamic frame within the frameset. As the designer, you plan
to have static and dynamic frames. A static frame might be a navigation
bar on the left. A dynamic frame may be opened to the right of
the navigation bar.

Below is an example of this concept
in a web page. The gray border was placed there in the photo editor
to illustrate the frameset. The left side is a table of contents.
It is static. The right side is where windows may open. The right
side also has links.

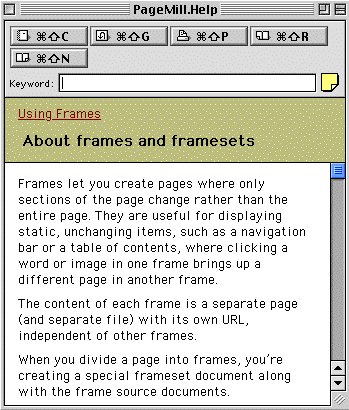
The PageMill Help description
of Frames appears below.

Frames should only be used by
more advanced web site designers. They can be confusing, and they
can make a site frustrating for the user. This lesson will show
the basics, but if you are interested in using frames, consult
the PageMill Help often.
Step #1: Creating the Frameset
and Saving it
- Make a new PageMill document.
- The easiest way to create a frameset is to go to the menu
bar and choose Edit => Frame => Split Frame Vertically.
This will give you a frameset with a left and a right side.
- You can resize your frames with click and drag. You can also
use the Inspector, select the frames tab and enter a percent
for the frame width.
- Save your frameset with File => Frameset => Save Frameset
As... and use a name that makes sense. Remember, the name you
use to save your frameset document must be lowercase and followed
by dot htm (.htm) just as with any html document.
Step #2: Renaming and Saving the Frames
- Click in the left frame. Notice that it is now outlined in
blue. Look at the Inspector window and find the Name bar.
- Click in the bar and rename the left frame.
- Now go to File => Save Frame As... This will give your
left frame a proper html document name.
- Do the same for the right side. Click on the right frame,
change its name, go to File => Save Frame As... and give the
right side a proper html name.
Step #3: Adding Content and Links to the Static
Side.
- The left side is usually the static side. It is often a table
of contents for the site.
- Click in the left side and enter a list of web pages. For
an example, see my classroom
site from last school year. Notice that when you click on an
item on the left, the topic opens up in either the right or as
a separate page. Those are good options to have. Your static
frame is used to determine where the new topic opens.
- Create a link to one of the items in your list on the left
frame of your frameset.
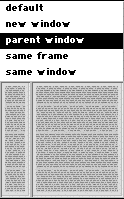
- Highlight your link and click and hold your mouse arrow on
the highlighted link. The Target Window opens. Choose "Parent
Window" so the new page opens without creating new Netscape
or Explorer windows.

- When the user views your page in a browser, the browser's
back button should return the user to the original location.
I have found this feature a little frustrating in PageMill. You'll
need to play with it for a while.
- You can also target a particular frame. Click and hold on
the highlighted link, and the Target Window opens. Drag to the
desired frame (usually the right frame).

Step #4: Adding Content to Frames
- Adding content to a frame is exactly like adding content
to any web page. The only difference is that your links need
to be targeted. The warning here is that linking to a target
is tricky in PageMill. Experiment until you get it right. Switch
to a browser to check frequently. I have found that the link
back from the right side should be to the original frameset rather
than to a parent window or the same frame.
Step #5: Uploading your Frameset
- Upload your frameset as well as your frames that are part
of your frameset.
- Upload any images and site links as well.


