Creating 3D BackgroundsandCloning Effects in HyperStudio |
Here is a great way to use animation with a three dimensional effect
Things to remember:
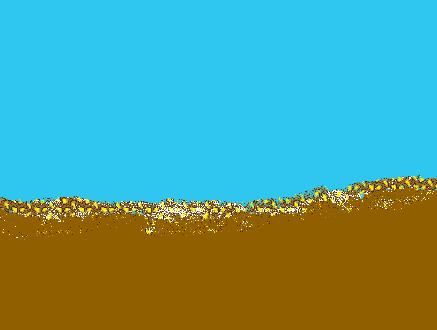
Make a seascape such as the one below in a 640 x 480 screen size.

Next, you need some kelp. Just right click (Windows) or click and hold (Mac OS) on the image below and "Save Image As..." to the folder containing your stack.
![]()
Now, you'll need to add this "kelpbar" to one of your scratch cards. Scratch cards are blank cards, say Cards 2, 3 and 4, where you add Clip Art that you can select and copy without ruining the precious background that you created but forgot to save (yeah?) in a previous card. Remember, Clip Art is part of a background, so if you select, copy, and paste, you may get part of the background that you don't want. You achieve a degree of background control when you use a scratch card. There are also some tricks to selecting on a scratch card that I'll reference later.
On your scratch card, go to "File => Add Clip Art..." and navigate to your folder containing "kelpbar". Choose "kelpbar" and select the kelp with the lasso tool and hit OK. Just double click on the lasso tool and HyperStudio selects the kelp for you. Amazing! (Double clicking the selecting tool selects all the graphics. Naturally, you want to use this when you only have one graphic available to select.) You'll see the kelp surrounded by the marching ants. Click OK.

Once the kelp is on your card, click outside it to place it. Now, select it again with the rectangle selecting tool. You can double click the rectangle tool to select the Clip Art.

You're going to scale this to 75% and then rotate it 90 degrees. Don't worry if you get it upside down. You can make lots of these, and it's good practice anyway. To scale and rotate, select with the rectangle tool as shown above and go to "Edit => Effects => Scale and Rotate" and you'll get this window. Make your choices.

Click OK and you'll be back to your scratch card. Click outside the kelp.
 The next
thing you are going to do is to reselect the kelp by double clicking on the
lasso. That will select the Clip Art on your scratch card as you see at the
left. (Remember, if you have more than one Clip Art on the card, they all
get selected when you double click.)
Now, copy the kelp with Control C and go to Card 1. Use Control V to paste it to your nifty little seascape.
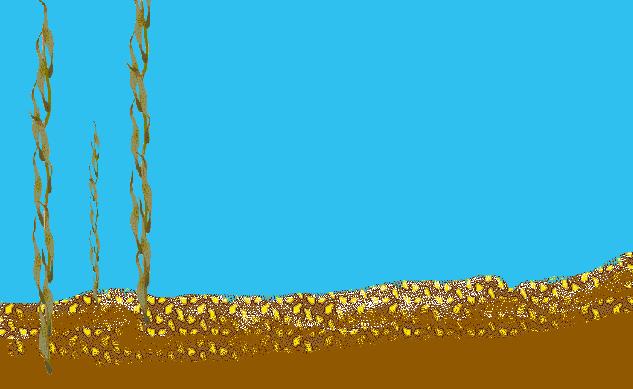
Since this is Clip Art, animated graphics will float over them. Place these clips toward the back. You can repeat the steps above to scale lots of kelp clips to different sizes. Here's what your Card 1 might look like.
Now, the next part is pretty slick, so pay attention.
Go to your scratch card.
Select some kelp with the lasso tool. Double click the lasso.
Go to "Objects => Add a Graphic Object".
A question is asked.

Just click "Yes" and name your graphic in the window that opens.
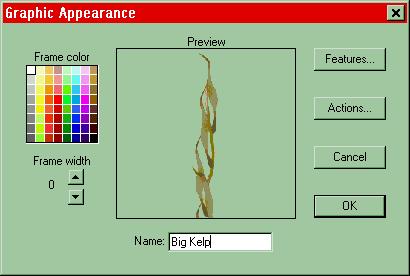
Click OK, and you will be returned to your scratch card.
The Clip
Art you once had is now a Graphic Object. The rules change! You select the Graphic
Object by clicking on the Graphic Editing tool. ![]() Copy the Graphic Object with Control C and go to Card 1 and paste the converted
Graphic Object in the scene towards
the bottom. The scene doesn't really change much, but you should
realize that the fish that we add to this scene will be able to swim in front of
the Clip Art and behind the Graphic Objects. We'll do that now!
Copy the Graphic Object with Control C and go to Card 1 and paste the converted
Graphic Object in the scene towards
the bottom. The scene doesn't really change much, but you should
realize that the fish that we add to this scene will be able to swim in front of
the Clip Art and behind the Graphic Objects. We'll do that now!
Animating is easy.
Go to "Objects => Add a Button".
Give the button a name. Fish 1 is a good name. Click OK.
Place the button in a corner so it's out of the way. Click outside the button.
In the "Things to do" section of the window that opens, make the button invisible and automatic.
Select "Play an Animation" also from the "Things to do" side of the window. Your animation will be selected from the "Library Disk" (hard drive folder), so choose the Fish from the HyperStudio Animation folder that opens. Click OK and follow the animation procedures given on the screen.
Once you click "any key", the Animator window opens. You're ready for the next step.
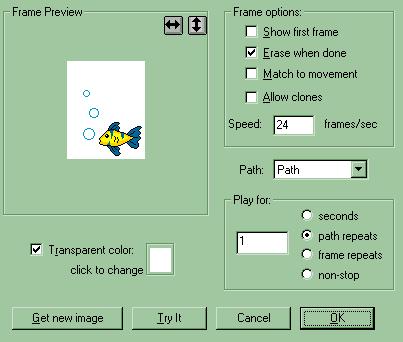
You've probably never done this before. Be alert! You're schmoozing with Vygotsky right now! Click on "Path" and choose "Path Options" from the menu.

In the "Path Options" window, click in the area under "Begin" and then uncheck the little box next to "Float over".
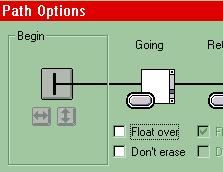
Hit OK and you're done!
If you click on "Allow Clones" in the "Frame Options" part of the "Animator" window a new fish appears whenever your button is clicked. Kids love this.