
At this point, it is a good idea to read parts 1 and 2 of The Non-designer's Web Book by Williams and Tollett. The authors not only review basic structures and concepts of the Internet and the Web, but they also go over website file organization and planning.
As well, Multimedia Projects in Education by Ivers and Barron will provide you with excellent insights into the decision making and preparation involved in planning projects for both "Strategies for Application and Presentation" and "Staff Development and Presentation". You should read chapters 1 - 3 and pages 108 - 116 (a bit of HTML) for some background.
Having a stack of books and tutorials is always handy. I have found that the Dreamweaver 2 Bible and Microsoft Office 2000 are both invaluable as references. Additionally, a Google search will net these results for Dreamweaver and FrontPage tutorials. Search for other tutorials. There must be hundreds out there!
Tilt stands for Text, Images, Links and Tables. The acronym was created by Jeff Peach as he sought to isolate some of the most important components of a website. Visit the TILT site, and you'll realize just how simple web authoring can be. For more TILT references, see also TILTing with Tables.
We're going to create a website in FrontPage and Dreamweaver using the TILT concepts. Open FrontPage, give the new page a title and save it in your website folder using the procedures in Lesson One.
T is for Text
Enter some text into the typing area. Below is an example of text.
Notice that in the image above I've highlighted the text. When you place the cursor to the left of a line in the text area, you'll notice that the cursor changes to an arrow. Clicking when that arrow appears will highlight the entire line of text. You may also click and drag to highlight just as you would in a word processor.
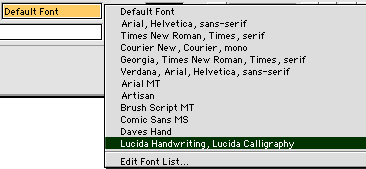
After selecting, I formatted the text. To do that, I used the Properties Palette. You'll notice a box with the words Default Font displayed. After selecting the text, I chose Lucida Handwriting and Lucida Calligraphy as the font.
Then, so that Licida Calligraphy is the chosen font, I highlighted and deleted Lucida Handwriting.
Then, I used the Style menu in the Properties Palette and chose Heading 1 as the style for that particular text.
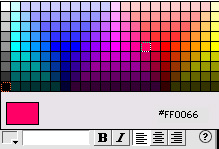
There are many other text formatting options you can experiment with. You can center, right or left justify your text using the toolbar icons. If you want to justify a whole line, you don't even need to select. Just make sure your cursor is placed somewhere in the line or paragraph you want to justify and use the options on the Properties Palette. To change the text color, simply select the text you want to format and click the appropriate color in the color palette on the Properties Palette.
The above toolbar shows the icons you can use for boldface, italics and left, right and center justification. Think word processing.
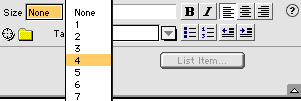
Changing the size of text is simply a matter of selecting the text and using the font size pull-down menu in the Properties Palette. Create some text all over your Text Editor.
Format the text as you like and play around with the options. Have fun.
Images
Adding and positioning images on your webpage is simple, but first we need lots of locations that allow us to acquire ready-made images. Below are several links in the thousands that are available on the web.
Images and animation
Backgrounds
Everything
Graphic text and logos
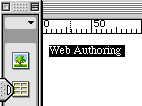
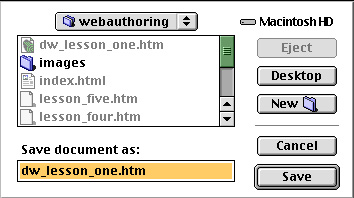
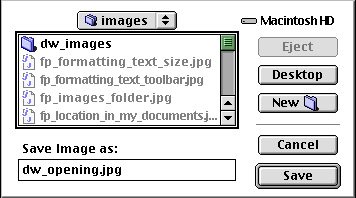
That ought to get you started. However, you do need to know how to get images from a webpage to your hard drive. This is really simple. On a Mac, just place the cursor arrow or browse hand on the image. Click and hold the mouse button and you'll see a window pop up that gives you the option to "Save this Image As..." . Choose this and navigate to your website folder created in lesson one. On a PC, simply right-click to do the same procedure. Place the image in your image folder that you've nested within the website folder. Below, the image on the left is the example I showed in lesson one. All my images for the webauthoring website go in the images folder. On the right is the image folder opened up so you can see that I've placed all relevant images in that folder. Those images are relative to this website.
So, now we can get and save images. There's more.
What are gifs and jpegs anyway?
GIF means Graphics Interchange Format and JPEG means Joint Photographic Experts Group (How would you like to party with these guys?). These are geek terms for image compression, and it's the way graphics are recognized by HTML code. Most of the time, you need to use lowercase letters followed by a dot and the extensions gif or jpeg (jpg) in order for internet servers to recognize that you've got a picture on your web page. If you're using Windows, the .gif or .jpg is placed there for you. Notice the extensions in the image above on the right.
Putting Images and backgrounds on your Web page
Now the easy part! This is so easy because it's very intuitive! Place your cursor where you want the image. Go to "Insert" and choose "Image" in the menu bar or use the icon on the Objects Palette.
A window opens. Navigate to your website folder, choose the image you want, and click on OK.
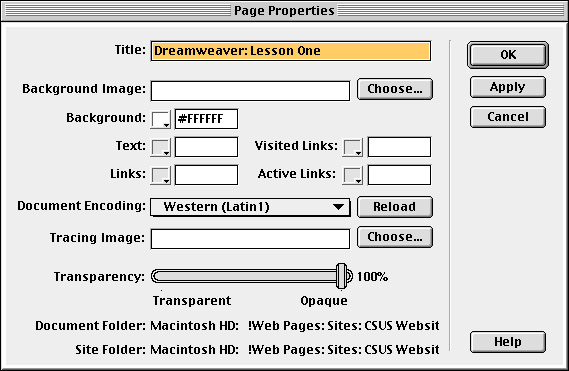
You can also add images as backgrounds. Select Modify => Page Properties to open the "Page Properties" window. You can see it below. Click the button that says "Choose" next to the Background Image textbox and browse to your Web Site folder where you should have some backgrounds in your images folder. If you have no backgrounds, go to Roger's Background Gallery and get some. You may also use this Yellow Flower background if you like. Experiment with a few. As you will see from some of my other pages, background images sometimes get in the way. If you don't like a background you have set, go back and browse to another one.
Text Wrap
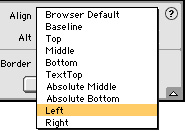
Finally, to wrap text around an image, add the image to a paragraph, select the image by clicking on it once, and then go to the Properties Palette. The text wrap options appear in the Properties Palette once you select an image. Select the one you want, click OK, and admire your work.
We've put a lot on this page, so we'll move to another page to learn about Links.
Links
.
